Wednesday 11 February 2015

2 – IN - 1 BAG

Sweet Nothings crochet free crochet patterns blog ; photo of the opened 2-in-1 bag (i.e. showing one of the ways it can be used)Sweet Nothings crochet free crochet patterns blog ; photo of the folded over 2-in-1 bag (i.e. showing the second folded way it can be used)
2 – IN - 1 BAG

This handbag has me fascinated.. a superb idea.. a 2-in-1 bag.. The bag can be used as a largish office bag and in the evening, if without warning, you’re suddenly got a night out – just take out all the stuff you don’t need in that bag, fold it down, and tad a!! It neatly becomes a clutch-like bag.  Neat ain’t it..

Thank you for joining me.

In case you have just joined me, know that you can access all of my earlier creations by checking under ‘categories’ on the right hand side of this blog under “Labels”.  Then, for your convenience, follow me here or on Facebook, You Tube, Pinterest, Twitter or Instagram.

Check out all my social media handles at the bottom of this blog

Oh, and may I add that the fastest way to find any of my blogs is via Pinterest.


All my blogs can be printed.  Find the printer friendly (green) link on the right side of this blog.  You can also hit Control P (or Command P for Mac) on your keyboard, and the blog will go directly to the connected printer.

Remember that you only print if absolutely essential.  Save paper – Save Our Earth. 


Do remember to add my blog URL when you make and show off your creation. 

Just copy the link on the search bar above - that's the blog URL.


To purchase this or similar yarn online, click the highlighted links below to buy your yarns online via Amazon.  While you will still pay the same, I may get paid by Amazon as well. 

This is a free blog - so do pay it forward for me.  Cheers.


Materials used : polyester purse yarn in cones , with a 4 mm  crochet hook ; embroidery needle sewing needle ; fabric glue to seal ends ; crochet stitch markers ; a nice smooth small pebble to make the button OR a wooden button zipper.

For Indians You could use Red rose , 4-ply knitting cotton , or unbranded knitting cotton or White Rose or bamboo knitting cotton , Milk cotton ; Silk yarns  ; Baby soft acrylic yarn , Ganga Spectrum as well

General yarn info : The yarn used today is not specific to this pattern.
You can use any yarn with a suitable hook to make this project to any size.
     
International yarns :  Among the international yarns I have used in this thickness, I’d suggest Aunt Lydia Cotton 10, Aunt Lydia Bamboo-Viscose 10, DMC Petra, Sullivans knitting cotton (Australia), Milford Soft, Hilaza Rustica Eclat , Alize cotton yarn and Alize bamboo yarn , Lily Sugar n' Cream cotton yarn, Caron Simply Soft , Bernat Softee chunky.

Stitches used :
Starting slip knot : https://youtu.be/lJcqsVcs8cw 

Starting slip knot 1 or the Sloppy Slip knot : https://youtu.be/YfC7KmGpifs 

How to hold your yarn in crochet : https://youtu.be/FwOlCbGdbqY

Foundation Single Crochet : fsc : https://youtu.be/mcT85fwh4mA  

What is a slip stitch : https://youtu.be/weB3QNbA8Iw

Double Crochet : dc : yo, insert hk into st ; yo (3 lps on hk); 
[yo, draw through 2 lps] twice.  One dc made.  
Check out the video at https://youtu.be/xdnjB27zpYo 

Chainless start for Double Crochet : I dislike the ch-2 / ch – 3 start, and this is what I do to start my row of dc. 
Check out the video at https://youtu.be/wskv3iTjRx0 

How to add beads : https://youtu.be/EcpgMgBox8I

How to work with beads in crochet : https://youtu.be/yanbAnF_pr0

How to change colors seamlessly : https://youtu.be/fRzSBja9jno 

How to carry your yarn when using two colors : https://youtu.be/NuascBU3pxQ 


Abbreviations used : (Using U.S terminology)
lp(s) : Loop(s)                         sc : Single crochet
hdc : Half double crochet       sp : Space                                           
sl-st : Slip stitch                      
st(s) : Stitch(es)                      hk : Hook
yo : Yarn Over                        ch : Chain
fdc : Foundation Double Crochet


Instructions : (Using U.S terminology)

Please note that I start all my rows with a ch 1, turning chain for ease.

Please check the top of this blog for easy video tutorials on all stitches used in today's pattern.  For your convenience there video tutorials through the blog too

Please read through all my notes before you pick up your hook, so you know just where we're heading in our pattern.

In my patterns I work with the principle of stitch count and body measurement.  This means that you need to work the stitch count in pattern, till you get the measurement (length and/or width) that you need for your project.  


So as usual, a quick analysis of what we’re off to do.  
So I suggest we start with a row of fdc (or chain if you so desire) and then we’ll work around this row of dc, extending our work to the top.  

With this pattern, you can work with any stitch you desire - sc / hdc or dc.

In the last few rows, we’ll make a little hand holding opening that will also neatly fit into a largish button.  
The button (when folded down and used as a 2-in-1) may not really ‘hold’ the bag shut – but will be more decorative. 


Part 1 : Bag

Foundation double crochet (fdc) : This is a unique way of starting a project directly with a row of double crochet stitches.  Here is an easy video tutorial https://youtu.be/hjNUYVvyU9k 


Start with a sufficient number of fdc that will be equal to the width of the finished bag you’re looking at making.
This means that if you want the bag 8" wide, your first fdc or chain row is 8" long.

We will now work back on this row of fdc, then around the end and along the bottom of the fdc, such that this fdc row will then become the base of our bag.

The video shows you how to work a fsc (foundation single crochet, using sc) into a round.  This is the same principle that we're using today, but starting with the fdc and then working hdc.
In case this video does not come on, please go to https://youtu.be/DwkKgtGaJMY


I have used hdc through the pattern, but if you’re using a thicker yarn, you may want to opt for the sc, to get a lovely small neat stitch and a great looking finished product.

Half Double Crochet : Hdc :  yo, insert hk into st ; yo (3 lps on hk) ; 
yo, draw through all 3 lps.  One hdc made.  
Check out the video at https://youtu.be/sDiELJdB2Dg

Chainless start for Half Double Crochet : I dislike the ch-2 start, and this is what I do to start my row of hdc. Check out the video at https://youtu.be/lWXpl1KdbZ8 

Row 1 : hdc in the 1st fdc and each fdc till end ;
Then turning your work at 90°, 
work 3 hdc in the last fdc (i.e the vertical bar of the fdc) ;
Then turning your work at 90°, 
work hdc in each fdc till end, and then once more
turning your work at 90°, 
work 2 hdc in that 1st fdc stitch.  
Join with a sl-st to the 1st fdc.

From now on we’ll work in rounds.  
If you wish to increase the width of your bag, please add 3 hdc in the centre hdc at the two ends of Round 2.
When I say 'centre hdc', it is the centre of the 3 hdc we've added in Row 1 when we turned.  For convenience, I suggest you place a marker there.

Round 2 : hdc in the 1st hdc and each hdc till end . 
Join with a sl-st to the 1st hdc.

Rep Round 2 till you have a bag of the length/ height you desire. *  

* Remember that we are going to make a small hand hold opening and a small handle as well, in a continuous motion – so work only till the length that you want that hand hole opening / handle.  
We’ll meet back here shortly. 


Hand hold opening idea : 
Now this will be a general instruction as we’ve all made different sizes for our project.
So here’s what we do – count the stitches on one side of your last row and determine the centre.  Then place your hand on that centre and approximate how many stitches you’d need for a comfortable hand hold.  

Place a marker on either side of that centre stitch to mark these end points. 
Label these as Markers 1 & 2.  
Repeat for the other side of the handle, and label those as Markers 3 & 4.  
Count stitches between Markers 1 & 2, and ensure they are the same as those between 3 & 4.  Make a note of the number of stitches.

Remember that the opening needs to be large enough to allow the fingers to hold the top of the bag but not too large to allow the button to pop off.  
That said, the button (as mentioned earlier) is probably more decorative than actually holding the bag down shut.

Round 1 : hdc in each st till 1st marker ; 
ch (as many stitches as you’ve skipped between Markers 1 & 2) , hdc in the 2nd marker ; 
hdc in each st till the 3rd marker ; 
ch (as many stitches as you’ve skipped between Markers 3 & 4), hdc in the 4th marker ; 
Join with a sl-st to the 1st hdc.  

So you have made two openings that are the chain stitches between Markers 1 -2 and Markers 3 - 4.  
Slip your hand in and check ease. 
Check that the holes are aligned.

In the following round, we will work the top bit, so if you need to add chain for ease or remove them, now is the time.

Round 2 : hdc in each hdc and 1 hdc in each ch all around. 
Join with a sl-st to the 1st hdc.

Round 3 : hdc in each hdc all around. 
Join with a sl-st to the 1st hdc.

Rep Round 3 once (or more times depending on how wide or thick you want your hand hold) more.
So keep working rounds and checking at the end of each round.

Fasten off and weave in ends.

Part 2 : Button
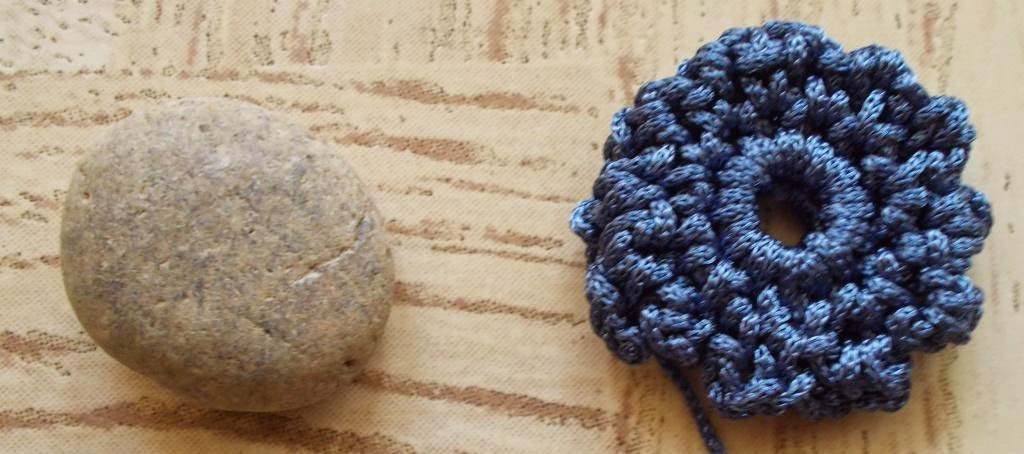
The Button : During our recent trip to Portugal, we visited this lovely waterfall at Pulo de Lobo, and all around were these lovely neatly smoothed pebbled.  
Just for fun, I’d collected a few and thought I’d make buttons with them.  Well, here’s my first successful experiment… and ideas on how to jazz up a regular button as well. 

I’ve been inspired by this pattern which is a  wonderful free floating free one over the net.  I am, as usual, writing down my notes, and am sharing them with you. 
This bag though, has no chart, so I’m just winging it.. not that it looks like it’s going to be a lot of trouble.. we’ll see as we go along, shall we? 

Of course, like the original pattern, you could add the simpler large button that easily slips into the hand hold as well.  

Do remember though, that if this is what you wish, you should adjust the opening accordingly, so do keep your button ready before you reach this point.

In case the video does not automatically start, go to https://youtu.be/h_NBm9dlE9c

As I’ve told you before though, I’d visited a waterfall and picked up this really lovely smooth pebble and thought I’d jazz this up for my bag.  
So here’s what I’ve done.
I’ve made two first halves and then joined the two together, slipping the pebble in between the halves.

Sweet Nothings crochet free crochet patterns blog ; photo of the pebble that I've used to make the button for this 2-in-1 bag ;

First half :

Magic circle : https://youtu.be/ISC39yOqWro 


Single Crochet : Sc : yo, insert hk into st ; yo (2 lps on hk); yo, draw through both lps.  One sc made.  Check out the video at https://youtu.be/ghACqBpA-3k


First stitch for Single Crochet : This is how I like to start my row of sc. Check out the video at https://youtu.be/6pVYRfsf4_M

Start : with a magic circle and 12 sc into that magic circle.  
Join with a sl-st to the 1st sc.

What is a chain stitch ?  https://youtu.be/pXx5ukBjKkY

Round 1 : *ch 3, sc in the next sc* ; 
rep *to* all around till end.  
Fasten off and weave in ends.

Second half :
Start : 
 with a magic circle and 12 sc into that magic circle.  
Join with a sl-st to the 1st sc.

We will now join our two halves.  

Sweet Nothings crochet free crochet patterns blog ; photo of the pebbled button for the 2-in-1 bag


Round 1 : ch 1, sc in the 1st ch-3 sp of 1st half ; 
ch 1, sc in the next sc of 2nd half ;
*ch 1, sc in the next ch-3 sp of 1st half ; 
ch 1, sc in the next sc of 2nd half * ; 
Read Note ;
rep *to* all around till end ; 
Join with a sl-st to the 1st st.

Note : When you’ve done halfway through Round 1 of the 2nd half, slip your stone / pebble in and holding it within the two halves, crochet around it, so that the pebble stays encapsulated within your neat crochet lace.

Fasten off and weave in ends.


Part 3 : Finishing
We’re ready to show off this lovely creation too.

Enjoyed this ?? I sure did.. come back right here for more freebie patterns 

Remember to share this blog post when you share your photos with me on Facebook.  I’d love to feature your photos on my FB page.  Cheers.

If you're visiting me here for the first time, and have liked the experience, do add me to your mailing list (for your convenience) , and all my future free patterns will come straight to your mail box.  

I’d appreciate if you could credit my blog (and link the original pattern link) when you make your own creation.  Thanks.

Check out my awesome pins on Pinterest at https://in.pinterest.com/shyamanivas/


Join me on YouTube at http://youtube.com/shyamanivas

And on my Facebook page at https://www.facebook.com/Sweet-Nothings-Crochet/ for more patterns.

Do follow me on Twitter https://twitter.com/ShyamaNivas


Find me on Ravelry at ravelry.com/projects/shyamanivas/

Have a great day and see you soon.  

If you'd like  to check out some of my other bag patterns, here goes


Here are some of my top creations.  Have fun with these free patterns too


and a doll’s top..


and some bolero/jacket/vests that will look grand on a top..


I have a few girls dresses, and just in case you want a dekho at those free patterns … here you go  


For cute hair embellishments and motifs check the links below.


..and some belts..