

LOTUS-NECK TOP
This world of the web and social networking has surely opened up a lovely avenue for me… and I should also add that it’s come at the perfect moment, when I have the time to indulge in my passion, my crochet.. not too many things that can keep me away from it.. and a host of friends who are constantly sharing inspirations for me to work with. I should probably add that I am blessed that each of my creations also finds a loving home – so how cool is this, right?
Thank you for joining me.
In case you have just joined me, know that you can access all of my earlier creations by checking under ‘categories’ on the right hand side of this blog under “Labels”. Then, for your convenience, follow me here or on Facebook, You Tube, Pinterest, Twitter or Instagram. Check out all my social media handles at the bottom of this blog
Oh, and may I add that the fastest way to find any of my blogs is via Pinterest.
Do remember to add my blog URL when you make and show off your creation. Cheers. Enjoy
To purchase this or similar yarn online, click on the link at the top right of this blog that reads click here to buy your yarns online via Amazon. While you will still pay the same, I may get paid by Amazon as well. This is a free blog - so do pay it forward for me. Cheers.
I’d initially called this a Pineapple top.. as this pattern is yet another pineapple delight, but the beauty is the design and construction – which unlike the regular pineapple starts, has a refreshing new one .. yet another reason for me to explore and work this pattern too. I then started working on it, and feel that though the construction is like a pineapple, the end effect (with that one row of dc 3-togs being left off) look more like a lotus – and it could also be the lovely pink top (that inspired me) leaving a lotus-like impression in my mind’s eye.
As I work on this pattern, I’ve written down my notes that I share with you.
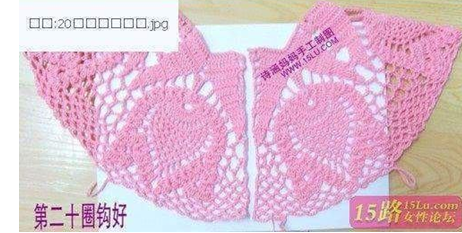
and the picture that inspired me

Materials used : Today I’ve used a light 3 ply acrylic yarn, with a 3 mm crochet hook
Difficulty level : Intermediate to Advanced crochet skills
Abbreviations used : Using U.S terminology
dc : Double crochet
ch : chain ch-sp : chain space
sp : space rep : Repeat
fsc : Foundation single crochet
fsc : Foundation single crochet
Stitches used :
Starting slip knot : Here’s how you start with a slip knot. https://youtu.be/lJcqsVcs8cw
Starting slip knot 1 or the Sloppy Slip knot : This is a neat new way to start your work without a slip knot. https://youtu.be/YfC7KmGpifs
What is a chain stitch ? Here is an easy video tutorial https://www.youtube.com/watch?v=pXx5ukBjKkY
Single Crochet : Sc : yo, insert hk into st ; yo (2 lps on hk); yo, draw through both lps. One sc made. Check out the video at https://youtu.be/ghACqBpA-3k
First stitch for Single Crochet : This is how I like to start my row of sc. Check out the video at https://youtu.be/6pVYRfsf4_M
Foundation Single Crochet : fsc : To refresh your skill on the fsc, please view this video https://youtu.be/mcT85fwh4mA
Double Crochet : dc : yo, insert hk into st ; yo (3 lps on hk);
[yo, draw through 2 lps] twice. One dc made.
Check out the video at https://youtu.be/xdnjB27zpYo
Chainless start for Double Crochet : I dislike the ch-2 / ch – 3 start, and this is what I do to start my row of dc.
Check out the video at https://youtu.be/wskv3iTjRx0
Foundation double crochet (fdc) : This is a unique way of starting a project directly with a row of double crochet stitches. Here is an easy video tutorial https://youtu.be/hjNUYVvyU9k
dc 3-tog : Double crochet 3-tog : [yo, insert hk in st or ch-sp, yo and pull up a lp ; yo and draw through 2 lps] 3 times (4 lps on hk) ; yo, draw through all lps on hk. One dc 3-tog made.
Here is an easy video tutorial at https://youtu.be/qlnqXDB3OUM
Instructions : Using U.S terminology
Please note that I start all my rows with a ch 1, turning chain for ease.
Please check the top of this blog for easy video tutorials on all stitches used in today's pattern.
Please read through all my notes before you pick up your hook, so you know just where we're heading in our pattern.
Quick analysis of what we’re going to do here today.
We start with the neckline in this lovely pineapple top and work our way down to the waist.
Now here’s a thought for you (as usual .. choices and decisions…) , the original pattern offers us an opened front bolero – but you *could* make this a top. Depending on the opening you wish for the back of the top, work the first few rows back and front, and then join up at the back, and work in rounds ..
and ta da ! Just like that, you convert this lovely bolero into a lovely top.
And just like that, naughtily, I’ve offered you choices.. and decisions :0
Now neckline calculations are generally a little tedious when starting a pattern from neck down – so what I usually do is keep a well fitting top as a template (top of the person for whom this is intended.. or a size similar to that) and then work accordingly. This is because the neckline can get a little too deep (or too high) and then it’s a long tedious work upwards to remove the whole creation and start afresh.
That said, I’m going to write this pattern down the way it has been charted.
So let’s get started.
Our stitch count is in multiples of 23 + 3
The designer has made 6 pineapples around the neckline – so in her case, that makes a total of 141 sts.
Start with the fsc per count above. Turn.
Now as I’ve used fsc, I’ve started with 141 sts.
IF you’re using ch (as has designer, pl add 2 ch = 143 ch)
Row 1 : dc in the 1st 2 fsc ;
*ch 2, sk next 3 fsc , dc in the next 8 fsc ;
ch 2, dc in the next 8 fsc ;
ch 2, sk next 3 fsc , dc 3-tog in the next fsc* ;
rep *to* 4 times ;
ch 2, sk next 3 fsc , dc in the next 8 fsc ;
ch 2, dc in the next 8 fsc ;
ch 2, sk next 3 fsc and dc in the last 2 fsc. Turn.

In the following row, we will use a decorative picot stitch.
How to work a picot stitch : Traditionally for a ch-3 picot, you work (ch 3, sl-st in 3rd ch from hook). For a ch-5 picot, you will do (ch 5, sl-st in 5th ch from hook).
In case this video doesn't come on, visit https://youtu.be/8s3zVaBcn4s
Row 2 : dc in the 1st dc ;
ch 2, sk next 2 dc and ch-sp , 2 dc in the next dc ;
dc in the next 6 dc ; dc in the next ch-2 sp ;
ch 3 dc in the same ch-2 sp ; dc in the next 6 dc ;
2 dc in the next dc ;
(ch 3, sk next dc , picot on top of the dc 3-tog) ;
*ch 3, sk next dc , 2 dc in the next dc ;
dc in the next 6 dc ; dc in the next ch-2 sp ;
ch 3 dc in the same ch-2 sp ; dc in the next 6 dc ;
2 dc in the next dc ;
rep (to) once* ;
rep *to* 3 times ;
ch 2, sk next dc , 2 dc in the next dc ;
dc in the next 6 dc ; dc in the next ch-2 sp ;
ch 3 dc in the same ch-2 sp ; dc in the next 6 dc ;
2 dc in the next dc ;
ch 2, sk next 2 dc and ch-sp , dc in last dc. Turn.

We will start with the unusual pineapple construction from this row on.
For this, we will start with a row of 12 ch, and then work on these ch to make the first bit of our pineapples.
So these set of instructions will be in brackets ( ), and are a little confusing.
Please look at the charts as you work.
Row 3 : dc in the 1st dc ;
ch 2, sk next dc and ch-sp , 2 dc in the next dc ;
dc in the next 7 dc ; dc in the next ch-3 sp ;
(12 ch , turn [and work on the ch just made] ,
sk 6 ch , sc in the next ch ; hdc in the next 3 ch and dc in the last 3 ch) ;
dc in the same ch-3 sp ;
dc in the next 7 dc ; 2 dc in the next dc ;
*ch 4, sk ch-sps and next 2 dc, 2 dc in the next dc ;
dc in the next 7 dc ; dc in the next ch-3 sp ;
rep (to) once ;
dc in the same ch-3 sp ;
dc in the next 7 dc ; 2 dc in the next dc* ;
rep *to* 3 times ;
ch 2, dc in the last dc. Turn.

Row 4 : dc in the 1st dc ;
ch 2, sk next dc and ch-sp , dc in the next 8 dc ;
*[ch 5, sk next dc , dc 3-tog in the next ch-6 sp ;
(ch 3, dc-3 tog in the same ch-6 sp) ;
ch 6, rep (to) 2 times] ;
ch 5, sk next 8 sts, dc in the next 8 dc ;
sk next dc, {ch 3 , picot} in the next ch-4 sp ;
ch 3, sk next dc, dc in the next 8 dc* ;
rep *to* 5 times ;
ch 2, dc in the last dc. Turn.

Row 5 : dc in the 1st dc ;
ch 2, sk next dc and ch-sp , dc in the next 7 dc ;
*ch 5, sk next ch-5 sp and dc 3-tog,
(dc 3-tog in next ch-3 sp ; ch 3, dc 3-tog in same ch-3 sp) ;
12 dc in next ch-6 sp ;
rep (to) once ;
ch 5, dc in the next 7 dc ;
ch 4, sk next dc and ch-sps , dc in the next 7 dc* ;
rep *to* till end ;
ch 2, dc in the last dc. Turn.

Row 6 : dc in the 1st dc ;
ch 2, sk next dc and ch-sp , dc in the next 6 dc ;
*ch 4, sk next ch-5 sp and dc 3-tog,
(dc 3-tog in next ch-3 sp ; ch 3, dc 3-tog in same ch-3 sp) ;
dc in next dc ;
[ch 1, dc in the next dc] ;
rep [to] 10 times ;
rep (to) once ;
ch 4, sk next dc, dc in the next 6 dc ;
ch 3, picot in the next ch-4 sp ;
ch 3, sk next dc , dc in the next 6 dc* ;
rep *to* till end ;
ch 2, dc in the last dc. Turn.

Row 7 : dc in the 1st dc ;
ch 2, sk next dc and ch-sp , dc in the next 5 dc ;
*ch 3, sk next ch-4 sp ,
(dc 3-tog in next ch-3 sp ; ch 3, dc 3-tog in same ch-3 sp) ;
ch 2, sk next dc, sc in the next ch-1 sp ;
{ch 3, sc in the next ch-1 sp} ;
rep {to} 9 times ;
ch 2, rep (to) once ;
ch 3, dc in the next 5 dc ;
ch 4, sk next 2 dc and picot , dc in the next 5 dc* ;
rep *to* till end ;
ch 2, dc in the last dc. Turn.

Row 8 : dc in the 1st dc ;
ch 2, sk next dc and ch-sp ,
[dc in the next dc ; dc 2-tog over the next 2 dc ; dc in the next dc] ;
*ch 3, sk next ch-3 sp ,
(dc 3-tog in next ch-3 sp ; ch 3, dc 3-tog in same ch-3 sp) ;
ch 3, sk next ch-2 sp, sc in the next ch-3 sp ;
{ch 3, sc in the next ch-3 sp} ;
rep {to} 8 times ;
ch 3, rep (to) once ;
ch 3, rep [to] once ;
ch 3, sk next dc , picot in the next ch-4 sp ;
ch 3, sk next dc, rep [to] once* ;
rep *to* till end ;
ch 2, dc in the last dc. Turn.

Row 9 : dc in the 1st dc ;
ch 5, dc 3-tog over the next 3 dc ;
*ch 6, sk next ch-3 sp ,
(dc 3-tog in next ch-3 sp ; ch 3, dc 3-tog in same ch-3 sp) ;
ch 3, sk next ch-3 sp, sc in the next ch-3 sp ;
{ch 3, sc in the next ch-3 sp} ;
rep {to} 7 times ;
ch 3, rep (to) once ;
ch 3, dc 3-tog over the next 3 dc ;
ch 7, sk picot, dc 3-tog over the next 3 dc* ;
rep *to* till end ;
ch 5, dc in the last dc. Turn.

Row 10 : dc in the 1st dc ;
ch 5, sk next ch-sp, sk next dc 3-tog, dc in next ch-6 sp ;
*ch 5, sk next ch-3 sp, (dc 3-tog in next ch-3 sp ; ch 3, dc 3-tog in same ch-3 sp) ;
ch 3, sk next ch-3 sp, sc in the next ch-3 sp ;
{ch 3, sc in the next ch-3 sp} ;
rep {to} 6 times ;
ch 3, rep (to) once ;
ch 5, dc in the next ch-6 sp ;
ch 5, sk dc 3-tog, dc in the next ch-7 sp* ;
rep *to* till end ;
ch 5, dc in the last dc. Turn.


Row 11 : dc in the 1st dc ;
ch 2, dc in next ch-5 sp ;
*[ch 5, dc in the next ch-5 sp] ;
ch 5, sk next ch-3 sp, (dc 3-tog in next ch-3 sp ; ch 3, dc 3-tog in same ch-3 sp) ;
ch 3, dc in next ch-3 sp ; ch 3, sc in the next ch-3 sp ;
{ch 3, sc in the next ch-3 sp} ;
rep {to} 5 times ;
ch 3, dc in next ch-3 sp ;
ch 3, rep (to) once ;
rep [to] 4 times* ;
rep *to* till end ;
ch 2, dc in the last dc. Turn.
Row 12 : dc in the 1st dc ;
[ch 5, dc in next ch-5 sp] ;
*rep [to] once ;
ch 5, sk next ch-3 sp, (dc 3-tog in next ch-3 sp ; ch 3, dc 3-tog in same ch-3 sp) ;
ch 3, dc in next ch-3 sp ; ch 3, sc in the next ch-3 sp ;
{ch 3, sc in the next ch-3 sp} ;
rep {to} 4 times ;
ch 3, dc in next ch-3 sp ;
ch 3, rep (to) once ;
rep [to] 5 times* ;
rep *to* till end. Turn.
Row 13 : dc in the 1st dc ;
ch 2, sc in the next ch-5 sp ;
[ch 5, sc in next ch-5 sp] ;
rep [to] once ;
*ch 3, sk next ch-3 sp, (dc 3-tog in next ch-3 sp ; ch 3, dc 3-tog in same ch-3 sp) ;
ch 2, rep (to) once ;
ch 3, sk dc and next ch-3 sp , sc in the next ch-3 sp ;
{ch 3, sc in the next ch-3 sp} ;
rep {to} 3 times ;
ch 3, sk next ch-3 sp and dc , rep (to) once ;
ch 2, rep (to) once ;
ch 3, sc in the next ch-5 sp ;
rep [to] 5 times* ;
rep *to* till end . Turn.
Row 14 : sc in the 1st dc ;
[ch 5, sc in next ch-5 sp] ;
rep [to] once ;
*ch 5, sk next ch-3 sp , (dc 3-tog in next ch-3 sp ; ch 3, dc 3-tog in same ch-3 sp) ;
ch 3, dc in next ch-2 sp ;
ch 3, rep (to) once ; sk next ch-3 sp and
{ch 3, sc in the next ch-3 sp} ;
rep {to} 3 times ;
ch 3, sk next ch-3 sp, rep (to) once ;
ch 3, dc in next ch-2 sp ;
ch 3, rep (to) once ;
sk next ch-3 sp , rep [to] 5 times* ;
rep *to* till end. Turn.
Row 15 : dc in the 1st sc ;
[ch 5, sc in next ch-5 sp] ;
rep [to] 2 times ;
*ch 3, sk next ch-3 sp, (dc 3-tog in next ch-3 sp ; ch 3, dc 3-tog in same ch-3 sp) ;
ch 2, rep (to) once ;
ch 2, sk next ch-sp , rep (to) in next ch-3 sp ;
{ch 3, sc in the next ch-3 sp} ;
rep {to} 2 times ;
ch 3, sk next ch-3 sp, rep (to) once ;
ch 2, sk next dc and ch-sp , rep (to) once ;
ch 2, rep (to) once ; ch 3, sc in the next ch-5 sp ;
rep [to] 5 times* ;
rep *to* till end. Turn.

Row 16 : sc in the 1st dc ;
[ch 5, sc in next ch-5 sp] ;
rep [to] 2 times ;
*ch 5, sk next dc 3-tog, sc in the next ch-3 sp
-i.e. between the two dc 3-togs ;
ch 5, sk next ch-2 sp and sc in the next ch-3 sp
- i.e. again between the two dc 3-togs ;
ch 5, sk next ch-3 sp, (dc 3-tog in next ch-3 sp ; ch 3, dc 3-tog in same ch-3 sp) ;
{ch 3, sc in the next ch-3 sp} ;
rep {to} once ;
ch 3, sk next ch-3 sp, rep (to) once ;
ch 5, sk next ch-2 sp, sc in the next ch-3 sp - between the two dc 3-togs ;
ch 5, sk next ch-2 sp, sc in the next ch-3 sp - between the two dc 3-togs ;
rep [to] 5 times ;
ch 5, sc in the next ch-3 sp* ;
rep *to* till end. Turn.

Row 17 : dc in the 1st sc ;
ch 2, sc in the next ch-5 sp ;
[ch 5, sc in next ch-5 sp] ;
rep [to] 5 times ;
*ch 5, (dc 3-tog in next ch-3 sp ; ch 3, dc 3-tog in next ch-3 sp) ;
ch 3, sc in the next ch-3 sp ;
ch 3, sk next ch-3 sp, rep (to) once ;
rep [to] 11 times* ;
rep *to* till end. Turn.
Row 18 : sc in the 1st dc ;
[ch 5, sc in next ch-5 sp] ;
rep [to] 5 times ;
*ch 5, (dc 3-tog in next ch-3 sp ;
ch 3, sk next two ch-sps and sc, dc 3-tog in same ch-3 sp) ;
rep (to) once more ;
rep [to] 12 times* ;
rep *to* till end. Turn.
And with this, we come to the end of the awesome lotus / pineapple pattern.
Yes, a little bit left to complete your top, but that’s easy peasy stuff now on
So hook down.. and take a look at the awesomeness you’ve created.. and yes, do go ahead and post a WIP.. no an AIP - Awesomeness In Progress on Facebook and Instagram.. and the other social pages .. get everyone a-buzzing on what you’re creating
Ok so now we will start with the relatively less tedious ch-5 sps that comprises the lower part of our top.
Just before we skip off to get that done, we need to divide for our armholes. So here’s what I am going to do.
Put the work down, and mark the centre fronts, back and sides.
Then let’s take a look at the lovely chart given by the designer.
Here’s what we need to do.
IF you have done exactly like the designer and gone with 6 lotus/pineapple repeats, then work per the instructions below.
If you’ve had to alter the number of lotus repeats, then you will need to divide for armhole depending on how small or large you wish that opening.
There is no fixed rule here, just ensure that you have an even number of lotus patterns on either side of the armhole opening, and that your front and back are dead centre.
Note : So one way to do the above is to place markers – so looking at the chart below, the first pineapple is for the front, the 2nd will be one sleeve, the next 2 pineapples will be the back, the 5th will be the second sleeve and the last one again is the front – so mark the ch-5 sp first, and then work this round .. else follow below..
Row 19 : dc in the 1st sc ;
ch 2, sc in the next ch-5 sp ;
[ch 5, sc in next ch-5 sp] ;
rep [to] 6 times ;
{ch 5, sk both dc 3-tog rep [to] once ;
rep [to] 3 times ; ch 23 - which accounts for the armhole ;
skip the next 22 ch-5 sps and sc in the next ch-5 sp} ;
rep [to] till you reach the last 32 ch-5 sps ;
ch 23, and then repeat the armhole pattern bit in reverse. Turn.
Now you can skip off and do a full body length of ch-5 sps all around till you reach the length you wish for your vest.
We’ll meet back here again for the finishing.
OK so how does one make this creation a bit smaller ??
Just ideas / thoughts.. as I have not actually done this.. but if you do, please do tag on your notes to the bottom of the blog (as comments) so we can help someone else with our endeavours. Thanks.
Right, so first off, if you’re thinking of making this smaller.. guess a lighter yarn and thinner hook should work.
If working with the same sized hook and yarn that I’ve used, and are happy with the top bit (pineapples / lotus yoke piece) and just want to reduce the bottom body bit, then instead of the ch 23, reduce that to say ch 10 (for maybe a size 34”-36”) and / or no ch at all for a size 32” – 34”). So if no chain at all, you will just do a ch-5 .. or just join the two ch-5’s for the fronts and backs.
And of course as suggested right at the start, this could be an open vest / bolero or a top.. so that’s one array of creations that one can whip up with just this one pattern.. now you know why I thought this pattern was just awesome ?!

Finishing : So once you’re done with the body, we will do a neat finishing edge to the whole garment. We will work in one continuous row from the front, around the neckline and back of neck, down the other side of front, and then round the base of the project.
Re-attach your yarn and do a round of sc.
We will then do a neat shell st = (hdc , 3 dc , hdc) all around. So I suggest we do an sc in the 1st st, then sk 2 sc and shell st in the next sc, sk next 2 sc and sc in that st all around.
You could also just do an sc in the 1st st, then sk 3 sc, shell st in the next st, sk next 3 sc and shell st in the next sc all around.
See which shell edging you like and go for it.
Use the same edging all around the armhole as well – or do what the designer has for the armhole = (ch 3, picot , ch 3) in each ch-5 sp all around.


Fasten off and weave in ends. Give yourself a big pat on the back as this one has really been a great project – but totally worth it, I’m sure you’ll agree.
And that’s done.. yet another project brilliantly executed !
Enjoyed this ?? I sure did.. Come back right here for more freebie patterns
Remember to share this blog post when you share your photos with me on Facebook. I’d love to feature your photos on my FB page. Cheers.
If you're visiting me here for the first time, and have liked the experience, do add me to your mailing list (for your convenience) , and all my future free patterns will come straight to your mail box.
I’d appreciate if you could credit my blog (and link the original pattern link) when you make your own creation. Thanks.
Check out my awesome pins on Pinterest at https://in.pinterest.com/shyamanivas/
OR just my free patterns at https://in.pinterest.com/shyamanivas/free-patterns-made-by-me/
Join me on YouTube at http://youtube.com/shyamanivas
And on my Facebook page at https://www.facebook.com/Sweet-Nothings-Crochet/ for more patterns.
Do follow me on Twitter https://twitter.com/ShyamaNivas
Do follow me on Instagram https://www.instagram.com/sweetnothingscrochet/
Find me on Ravelry at ravelry.com/projects/shyamanivas/
Do also visit me at http://www.craftsy.com/user/2573073/pattern-store?_ct=cx-buvjdql&_ctp=my-pattern-store,manage
Have a great day and see you soon.
I have a few tops already made, and just in case you want a dekho at those free patterns … here you go
Here are some of my bolero creations. Have fun with these free patterns too


