SWEATER & HEADBAND FOR AARTI
This is a really simple project for a cute young
lady. I gave a whole set of ideas to the
mum and she wanted something ‘really simple’.
None of the really simple ones that I sent were simple enough, but here's what I've done.
Thank you for joining me.
In case you have just joined me, know that you can access all of my earlier creations by checking under ‘categories’ on the right hand side of this blog under “Labels”. Then, for your convenience, follow me here or on Facebook, You Tube, Pinterest, Twitter or Instagram.
Check out all my social media handles at the bottom of this blog
Oh, and may I add that the fastest way to find any of my blogs is via Pinterest.
All my blogs can be printed. Find the printer friendly (green) link at the bottom of this blog. You can also hit Control P (or Command P for Mac) on your keyboard, and the blog will go directly to the connected printer.
Remember that you only print if absolutely essential. Save paper – Save Our Earth.
Do remember to add my blog URL when you make and show off your creation.
Just copy the link on the search bar above - that's the blog URL.
To purchase this or similar yarn online, click here to buy your yarns online via Amazon. While you will still pay the same, I may get paid by Amazon as well.
This is a free blog - so do pay it forward for me. Cheers.
Materials used : Today I’ve
used ~ 200 gms of the lovely Bella Baby Baby Wonder & 50 gms of White Bella Baby
Marvel Soft Baby 4-ply acrylic yarn with a 3.5 mm crochet hook
Size made : For
a 5 yr old
Difficulty level
: Intermediate Skill level
Stitches used : Using U.S terminology
Double Crochet : dc : yo, insert hk into st ; yo (3 lps on hk);
[yo, draw through 2 lps] twice. One dc made.
Chainless start for Double Crochet : I dislike the ch-2 / ch – 3 start, and this is what I do to start my row of dc.
Invisible join : Here’s a quick tutorial on how to join using the embroidery needle and whipstitch to get an invisible join at https://youtu.be/a6XZQ6VzJFM
Here is a sizing chart for general neck sizing
Here is a sizing chart for general body sizing
Abbreviations used :
ch : Chain sp(s) : Space(s)
dc : Double crochet hk : Hook
st(s) : Stitch(es) sl-st : slip stitch
sk : Skip sp : space
rep : repeat
fsc : Foundation single crochet
Instructions
Please note that I start all my rows with a ch 1, turning chain for ease.
Please check the top of this blog for easy video tutorials on all stitches used in today's pattern.
Please read through all my notes before you pick up your hook, so you know just where we're heading in our pattern.
In my patterns I work with the principle of stitch count and body measurement. This means that you need to work the stitch count in pattern, till you get the measurement (length and/or width) that you need for your project.

The original pattern for this is from www.redheart.com and
is titled the Child's friendship knot sweater No WR 1980
This is a free pattern, but its for a top – and
has just one front and one back.
I am
using this pattern to make a front open sweater, so following the pattern with
a twist. Here are my notes as I make this pattern.
Please refer to the original link for the
pattern of the top. Thank you.
The pattern starts at the bottom ribbing and we
work our way up to the armholes and neck/shoulders. For the ribbing, we will work up and down in
back loops to get the ribbed effect.
Once we’re done with the ribbing, we will pick
up stitches along one side of the ribbed edge (which forms the width of our
sweater or top) and then work side to side all the way up to the
shoulders.
1. I
started with 12 fsc for the front band which equals about 2” of ribbing.
2. My
yarn is pretty thin, so I found it a little tedious to work a slip stitch in
each back loop, and have worked an sc instead – so used the sc-blo or Single
Crochet in back loops only for my ribbed bottom start.
3. I
am working on a sweater with two fronts and one back. I started per pattern
with the ribbing for the back, and worked as many inches as needed for the back
(i.e half round waist measure). The
pattern works the ribbing along the width first, and then the number
of rows you will work will depend on the length or half round waist
measure.
4. For
the two fronts, if you are planning on a small button placket, then calculate
the width you’ll need for this placket and then work only as many inches as
needed after deducting placket width. So
say your round waist measure is 24”. You
will work 12” for the back. Then if you
decide say 2” button placket, you will work a total of 10” for fronts, so 5”
only per front side. Got it?
5. The
pattern is absolutely awesome and so simple – and can be worked totally in one
colour. Just for a difference, I’ve added
a second color, and I thought that this really brought out the stitch pattern.
6. The
pattern has a slight armhole decrease and shaping. I’ve decided not to shape at all, and make
one rectangle for the back and fronts (straight armhole) and then make two
rectangles (without shaping of round arm at the end) for the sleeves. As I wanted to ensure that the stripes (in my
alternate color) went down the arm (as against round the arm), I’ve worked a
rectangle with the start fsc row that will be the length of the arm, less the
cuff width. For the cuff, I am going to
repeat the ribbing pattern that is worked along the bottom of the sweater.
7. Finally
for finishing it all neatly off, I am going to work in a placket that will
start from the front, go around the back and then return to the front
placket. Work in the missed stitches for
the button holes when working in the placket.
Part 2 : Headband
I used the
belt pattern given to make a headband.
1. I started with 10 fsc and
worked 5” as given in pattern till the row splits into two sets of 5 sts each
2. Instead of the suggested sc,
I’ve used hdc in each st till end, mainly because my yarn is pretty thin.. and
I feel that the hdc will show the pattern off better.
3. I followed all instructions
till making of the knot and stitching it securely. I’ve the re-attached my yarn at one end, and
extended the strip till I have the length needed for my headband.
4. I then joined the strip to
the other end to make it one continuous round headband.
5. The other idea is to attach
a satin ribbon to either sides of this knotted strip, and that can be used
either as a headband or a belt. A light
scarf will even make it a trendy headpiece for an adult. Go ahead and create.. remember to tag me
though, so we can all ooh and aah together on your creation.
Part 3 : Make your own button
I should
also share a new idea I had for the button. I had these lovely little pink
beads that I’d already used on that final row, and thought they’d look lovely
as a button. So first I took a regular shirt /pant button and covered it with a
little fabric. I then sewed in the beads
onto that little fabric top. The base of
the button was easy to attach on, as there is the fabric to hold on to.. and I
think the end result is pretty amazing.. what do you think?
For more
information and photos, visit
Part 4 : Finishing
Attach the
sleeves. Add in your buttons. Fasten and weave in all ends. Ta da ! You’re done! What a beauty you’ve created. I’m so happy
and proud, and I’m sure you are too.
Enjoyed this ?? I sure did.. come back right
here for more freebie patterns
If you're visiting me here for the first time, and have liked the experience, do add me to your mailing list (for your convenience) , and all my future free patterns will come straight to your mail box.
I’d appreciate if you could credit my blog (and link the original pattern link) when you make your own creation. Thanks.
Have a great day and see you soon.
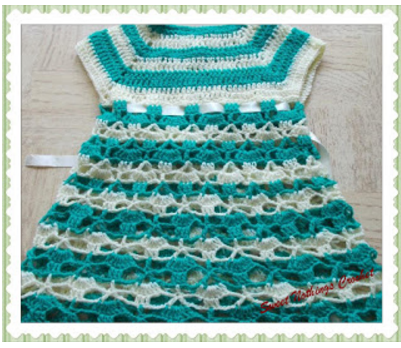
I have a few girls dresses already made, and just
in case you want a dekho at those free patterns … here you go